
Last Updated: October 29, 2026
Quick Summary
A unifi access installation is a planned project covering hardware, network, door wiring, camera placement, software setup and testing. Start by building a bill of materials and confirming PoE wattage, lock supply current and cable run lengths before ordering. Then wire each door, configure fail-safe or fail-secure settings to match the hardware, and test every lock and camera.
- Total PoE wattage and lock supply current are the two numbers that most often sink an install.
- Keep each Ethernet run under 328 feet (100 meters), the copper Ethernet limit.
- Never install a fail-secure lock on a door that serves as a required means of egress.
- Set the lock hardware fail-safe or fail-secure first, then mirror that setting in the UniFi Access software.
- Change default passwords, turn on two-factor authentication and keep firmware updated.
Table of Contents
- UniFi Access System Requirements Before You Buy
- Planning Camera Placement for Full Coverage
- Wiring the Door Reader, Lock and Controller
- Setting Up UniFi Door Access Control Step by Step
- Connecting a Wireless UniFi Protect Camera
- Testing, Security Settings and Ongoing Maintenance
- Booking a Professional Install With Flatirons Locksmiths
- Frequently Asked Questions
Setting up a UniFi access installation for a building with both access control and cameras is a real project, not a weekend gadget install. Get the planning right and the wiring, network and configuration steps go smoothly. Skip it, and you end up pulling cable twice. This guide covers the full job: hardware, network, door wiring, camera placement, setup and testing.
UniFi Access System Requirements Before You Buy
Before you order anything, confirm the system will fit your building. Check your controller, your network and your power budget first. Most installation problems come from skipping this step, and most of those problems show up as a dead reader or a camera that drops offline mid-shift.
Build a Bill of Materials First
Make a bill of materials before buying. List every door, reader, lock, camera and controller, then check each part against the current UniFi compatibility documentation. A workable BOM has five columns: location, device model, PoE class or power draw, cable run length, and mounting hardware.
- Controller, confirm it supports the number of doors and cameras you need, and that it has enough storage for the retention period you want
- Door hubs and readers, one hub per group of doors, one reader per controlled side
- Locks, strike, maglock or electrified lockset, matched to door type and frame
Network, Power and PoE Requirements
Most UniFi devices use Power over Ethernet (PoE), so one Ethernet cable can carry both data and power. This keeps wiring simple, but your switch must supply enough power, and the PoE standard has to match the device.
Add up the power draw of every device on the switch and leave headroom for growth. Keep total PoE load comfortably below the switch’s budget so a single device failure or a firmware update does not brown out the rest of the system.
- Use a managed PoE switch with enough total wattage and the right PoE standard (PoE, PoE+ or PoE++) for each device
- Run Cat 5e or Cat 6 cable for each device; Cat 6 is the safer choice for runs near electrical equipment
- Keep each Ethernet run under 328 feet (100 meters), the limit for copper Ethernet, not a suggestion
The two numbers that sink most installs are total PoE wattage and lock supply current. Add both up before you buy a switch or a power supply, and buy one size larger than the math says you need.
Ports, Cable and Conduit Planning
Count ports before you count devices. Each reader, camera and uplink needs a switch port, and a door hub may need its own. Confirm the model’s PoE budget, not just its port count, before buying.
Plan cable paths while the walls are open. Indoor runs can use plenum-rated cable in air-handling spaces; outdoor runs need UV-rated or conduit-protected cable, and buried runs need direct-burial or conduit.
Tools and Pre-Installation Checklist
Gather the tools before the first device arrives: a cable tester, a tone generator, a punch-down tool, a drill and bits for the door and frame material, a level, a multimeter for lock voltage, and a label maker. A ladder and a helper are not optional for ceiling camera work.
Run this checklist before you order:
- Every door measured for frame depth, door thickness and closer clearance
- Every camera location walked at day and night for light and sightlines
- PoE wattage totaled with headroom
Getting this right up front saves time and rework later.
Planning Camera Placement for Full Coverage
Good camera placement matters more than camera count. Start with the spots that matter most: entry doors, parking areas and any blind corners.
Mount cameras high enough to resist tampering. Aim them to capture faces at entry points, not just the tops of heads.
Walk the property at night before you finalize positions.
Camera placement decisions are easier to compare at a glance when the key points are laid out side by side.
| Factor | What to check | Why it matters |
|---|---|---|
| Entry doors | Faces captured at entry points | Identification requires facial detail |
| Mounting height | High enough to resist tampering | Limits access and damage |
| Aim | Avoid bright windows and direct sunlight | Glare ruins the image |
| Lighting | Walk the property at night | Daytime views can mislead |
| Blind corners | Cover parking areas and corners | Closes gaps in coverage |
Wiring the Door Reader, Lock and Controller
Wiring is where many DIY attempts go wrong. Turn off power at the breaker before touching any wire, and label every conductor at both ends so you can troubleshoot later without ringing out the whole run.
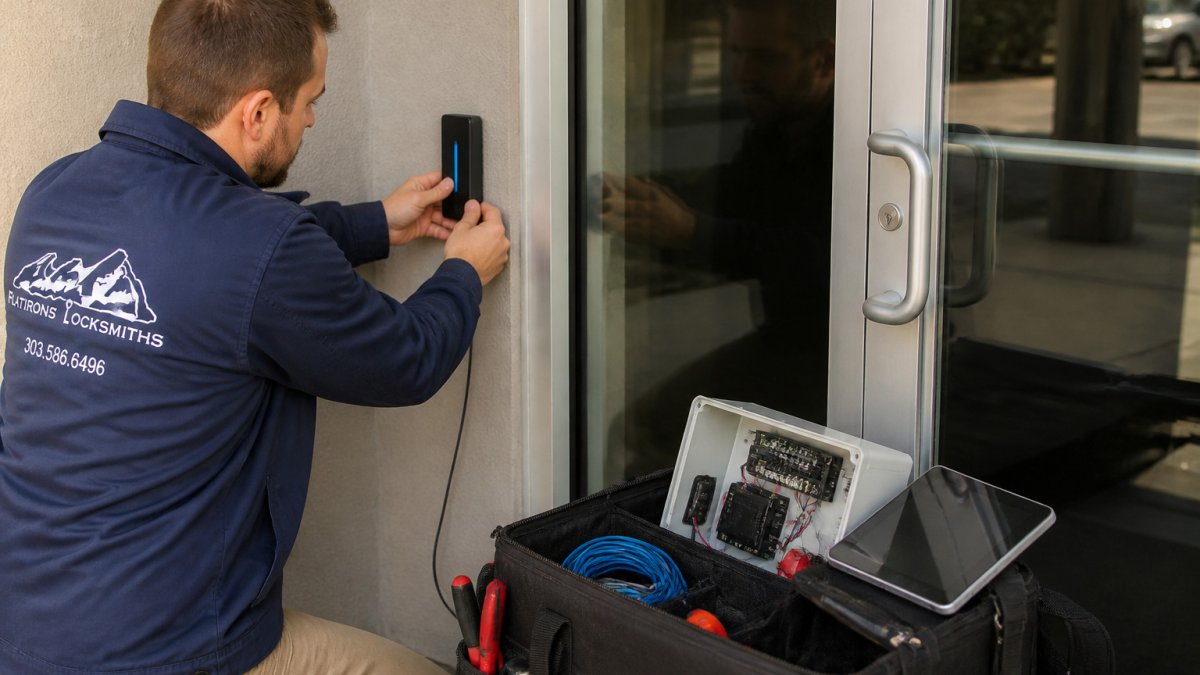
A typical UniFi Access door uses six wire groups. Plan them before you pull cable:
- Lock power, 12V or 24V DC from a dedicated power supply, sized to the lock’s holding current (not its inrush current)
- Lock control, the dry-contact relay from the UniFi Access hub or door controller that switches the lock supply
- Door position sensor (DPS), a reed switch in the frame or a monitored contact in the lock that confirms the door is closed
Lock Types and What Each One Needs
Match the lock to the door before you buy anything else. The three common configurations behave very differently:
- Electric strike, replaces the strike plate in the frame and releases the latch. It needs a power supply, a relay from the controller, and a frame that can accept the strike body. Best for wood or hollow-metal frames with a standard cylindrical lockset.
- Magnetic lock (maglock), holds the door with electromagnetism and releases when power drops. It needs a power supply, a relay, and a bond sensor if you want door-position status. Maglocks are the classic fail-safe device and are common on glass and aluminum storefront doors.
- Electrified lockset or panic hardware, the lock body itself is electrified, so the door keeps its existing latch and closer. It needs a power transfer hinge or door loop, a power supply, and a relay. This is the option most often required on fire-rated egress doors because the mechanical exit device still works when power is lost.
Never install a fail-secure lock on a door that serves as a required means of egress. Building and fire codes generally require free egress at all times, and a locked door on an exit path is a life-safety violation regardless of what the access system is doing.
Fail-Safe Versus Fail-Secure Configuration
This setting decides what happens when power is lost. A fail-safe lock unlocks when power drops, which is common on exit paths for fire safety. A fail-secure lock stays locked, which suits most entry doors, server rooms and storage closets.
The setting lives in two places, and both have to agree:
- The lock hardware itself, a maglock is inherently fail-safe; an electric strike can be ordered fail-safe or fail-secure; an electrified lockset is usually field-configurable.
- The UniFi Access door setting, tell the controller which behavior the hardware has so the relay logic and door status reporting match reality.
If the two disagree, you get the worst outcome: a door that reports locked while it is physically open, or a relay that fights the lock and burns out the coil. Set the hardware first, then mirror it in the software.
Relay Behavior, REX and Egress
The relay is the switch that actually fires the lock. UniFi Access hubs and door controllers provide a dry-contact relay, which means they do not supply lock power, the lock supply does.
A request-to-exit device shunts the door so a person can leave without presenting a credential. Wire the REX to the controller’s REX input, not directly to the lock, so the system logs the exit and holds the door unlocked for the programmed shunt time (typically 5 to 30 seconds).
Set the relay unlock time to match the door closer, not the other way around. A relay that releases for two seconds on a heavy door with a slow closer will report a forced-open alarm every time someone walks through.
Door Hardware Compatibility
Before you order a reader, confirm the door can accept it.
Follow the wiring diagram in the manufacturer’s installation guide exactly. Small mistakes, like reversed polarity on a lock or a relay wired in parallel, can damage hardware or leave a door permanently unlocked.
For a more general walkthrough of installing a smart lock on a door, see How to Install a Smart Lock on an Existing Door.
Setting Up UniFi Door Access Control Step by Step
Once the hardware is mounted and wired, set up the software for your UniFi access installation. Work through these steps in order:
- Power on the controller and connect it to the network
- Open the UniFi Access interface and sign in
- Add each door and assign its reader and lock
- Set the door type (fail-safe or fail-secure) to match your wiring
- Create user groups and schedules
- Enroll credentials, such as key fobs, cards or mobile access
- Run a test unlock on each door before going live
Keep a record of every change. This helps when you need to troubleshoot later. For a more general walkthrough of installing a smart lock on a door, see How to Install a Smart Lock on an Existing Door.
For homeowners setting up a smaller system, our Smart Lock Installation for Homeowners: Step-by-Step guide covers the same kind of hardware with simpler steps.
Connecting a Wireless UniFi Protect Camera
Wireless cameras are easier to place but need a strong signal. Test signal strength at the mounting spot before drilling.
Pair the camera with the UniFi Protect controller, then confirm it appears in the app. Check live video quality and the motion detection zone.
If signal is weak, move the camera, add an access point or run a wired connection where possible.
Testing, Security Settings and Ongoing Maintenance
Test everything before you consider the job finished. Lock and unlock each door from the app and from the reader. Confirm every camera shows live video and records events. Check that alerts reach the right phone.
Secure the system itself:
- Change default passwords on the controller and every device
- Turn on two-factor authentication for admin accounts
- Limit remote access to trusted users
Review user access every few months. Remove credentials for former employees or lost fobs right away. Clean camera lenses and check mounts after storms or heavy winds.
For a deeper look at modern video surveillance for business, read Modern Video Surveillance for Business: 2026 Guide. If you are weighing requirements before buying, Commercial Access Control System Benefits in 2026 explains what a commercial system should do for your operation.
Booking a Professional Install With Flatirons Locksmiths
Many people can handle parts of this project, but a mixed system of doors, cameras and network gear is easy to get wrong.
Pricing depends on the number of doors, cameras, wiring runs and site conditions. Flatirons Locksmiths provides upfront quotes before work begins. To get a quote or schedule an appointment, book a commercial door hardware installation with our team.
Frequently Asked Questions
What equipment do I need to install a UniFi Access system?
A basic UniFi Access installation needs a UniFi Access hub or controller, one or more access readers, an electric strike or magnetic lock, a power supply sized for the lock, network switching with Power over Ethernet where supported, and Ethernet cable run to each door. Confirm the exact model compatibility in the UniFi documentation before buying, because reader and hub generations differ. Plan the cable path, the power budget and the mounting location for each reader before ordering, so you do not discover a missing part halfway through the job.
Can UniFi Access and UniFi Protect work together?
Yes. UniFi Access and UniFi Protect both run on the UniFi network and can be managed from the same console, so a door event can be paired with camera footage of that doorway. Set both up on the same network segment, confirm firmware versions are compatible, and link the door and camera in the management interface so events and video line up. Test a door event against the matching camera view before treating the integration as working.
When should I hire a professional to install UniFi access control and cameras?
Hire a professional when the job involves running new low-voltage cable through finished walls, wiring electric strikes or magnetic locks to a building’s power, or meeting fire and life-safety requirements for egress doors. A licensed locksmith or low-voltage installer can also verify fail-safe and fail-secure behavior against your building’s code. For a simple reader swap on existing wiring, a handy homeowner can often do the work. Flatirons Locksmiths offers installation quotes, so contact the company for current pricing based on your site.
