
Table of Contents
- Before You Start: Smart Lock Installation Tools and Door Checks
- Smart Lock Compatibility With Existing Deadbolt Hardware
- Retrofit vs. Full Replacement: Which Approach Fits Your Door
- Step-by-Step: Removing Your Existing Deadbolt and Hardware
- Step-by-Step: Installing the New Smart Lock
- Smart Lock Setup and Calibration
- Common Smart Lock Installation Mistakes to Avoid
- Testing, Troubleshooting, and When to Call a Professional
- Frequently Asked Questions
Last Updated: October 20, 2026
Before You Start: Smart Lock Installation Tools and Door Checks
Most failed smart lock installation jobs start with a skipped measurement. Before you touch a screwdriver, check that your door can actually take the lock you bought. This guide walks through the full process, from measuring your door to testing the finished lock. Get the prep right and smart lock installation on an existing door takes about 30 to 60 minutes.
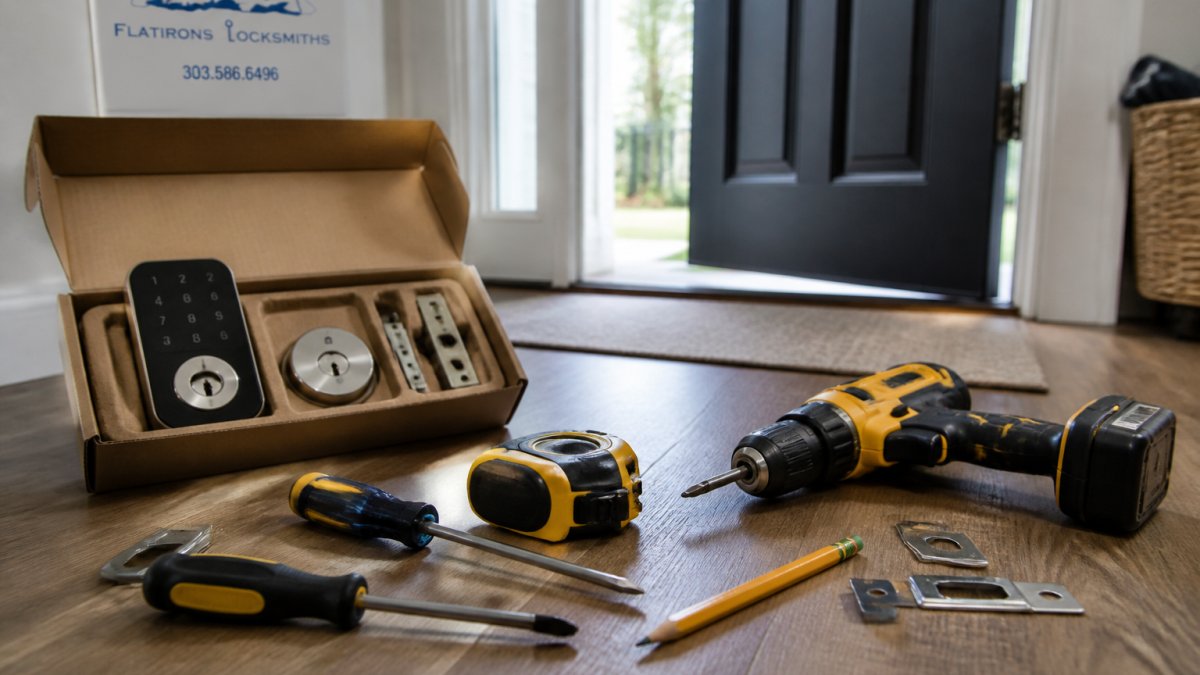
Tools You Will Need
Gather these before you start:
- Phillips and flathead screwdrivers
- Tape measure
- Pencil
- Drill with a 1-inch bit (only if you are enlarging the borehole)
- Chisel and hammer (for strike plate adjustments)
- Level
- New batteries in the correct size
Most smart lock kits include the mounting hardware. Keep the old screws in a bag; you may need them if a new screw strips.
Measuring Door Thickness and Backset
Door thickness and backset decide whether a smart lock fits at all. Backset is the distance from the door’s edge to the center of the borehole. Standard backsets are 2-3/8 inches and 2-3/4 inches. Most smart locks list a supported range, often 1-3/8 to 2 inches thick.
Measure both, write them down, and compare against the lock’s spec sheet before you open the box.
Buying a smart lock without checking backset is a common mistake. A lock built for a 2-3/8-inch backset will not line up on a door drilled at 2-3/4 inches, and the fix means drilling new holes.
Smart Lock Compatibility With Existing Deadbolt Hardware
Compatibility with your existing deadbolt is the make-or-break check. A smart lock replaces the deadbolt, not the whole door. It needs a borehole and a latch hole that match its mounting plate, and the measurements have to be taken precisely, not eyeballed.
The Five Measurements That Decide Fit
Take these before you buy, and write each one down:
- Door thickness. Measure at the edge, not through the face. Most smart locks support 1-3/8 to 2 inches; thicker doors need a longer spindle or a different model.
- Backset. Measure from the door’s edge to the center of the borehole. The two standard backsets are 2-3/8 inches and 2-3/4 inches. A lock built for one will not line up on a door drilled for the other.
- Borehole diameter. The hole through the face of the door is typically 2-1/8 inches for a standard deadbolt. Confirm the lock’s cylinder and mounting plate clear that opening.
- Cross bore (latch hole). The hole through the door’s edge is usually 1 inch. If a previous installer enlarged it, the new latch may sit loose and the bolt will bind.
- Door handing. Note whether the door swings left or right and which side the hinges are on. Most smart locks auto-detect handing during setup, but some require a manual setting.
Compatibility Checklist
Run through this before you open the box:
- Door thickness within the lock’s stated range
- Backset matches (2-3/8 or 2-3/4 inches)
- Borehole diameter matches the lock’s cylinder
- Cross bore is 1 inch and undamaged
- Door material is wood, fiberglass, or metal the lock supports
- Existing deadbolt is a standard single-cylinder type, not a mortise lock
- Door frame has room for the new strike plate
A lock built for a 2-3/8-inch backset will not line up on a door drilled at 2-3/4 inches, and the fix means drilling new holes. Measure both numbers and compare them against the spec sheet before you buy.
When a Check Fails
If your door has a mortise lock, an unusually large borehole, or a non-standard backset, a retrofit lock may not work. Check the manufacturer’s compatibility guide first. In many cases a full-replacement lock or a model with an adjustable backset is the better path, and a locksmith can confirm which before you spend money on a lock that will not fit.
Retrofit vs. Full Replacement: Which Approach Fits Your Door
Retrofit and full replacement are the two paths, and they suit different doors. A retrofit smart lock fits over your existing deadbolt hardware and reuses the current borehole. A full replacement means removing the old deadbolt and installing a complete new lock body.
| Approach | Best For | Effort | Main Trade-off |
|---|---|---|---|
| Retrofit | Standard doors, renters, quick installs | Low | Limited to compatible hardware |
| Full replacement | New doors, damaged hardware, custom setups | Higher | More drilling and alignment work |
Retrofit locks are the easier choice for most homeowners. Full replacement gives you more control over security and finish, but it takes longer and needs more tools.
If you rent, a retrofit lock lets you keep the original deadbolt and swap it back when you move out. Store the old hardware and screws in a labeled bag.
Step-by-Step: Removing Your Existing Deadbolt and Hardware
Removing the old deadbolt is straightforward. Work from the inside of the door so you can see the assembly.
- Remove the interior thumb turn by unscrewing the mounting plate screws.
- Pull the interior assembly off the door.
- Remove the exterior faceplate from the outside.
- Unscrew the latch or deadlatch from the door edge.
- Pull the latch out of the borehole.
- Remove the strike plate screws from the door frame.
Keep every screw and part in one place. Check the borehole for splinters or debris and clean it out before the new lock goes in.
Step-by-Step: Installing the New Smart Lock
Installing the new smart lock follows the reverse order. Read the manufacturer’s instructions first, since screw placement varies by brand.
Mounting the Exterior Keypad and Interior Assembly
Start on the outside. Feed the keypad’s connecting cable through the borehole, then press the exterior faceplate against the door. On the inside, thread the cable through the mounting plate and hold the plate in place.
Wiring, Batteries, and Door Handing
Connect the interior assembly to the exterior cable, following the lock’s diagram. Match the connectors carefully; they only fit one way. Install fresh batteries in the correct orientation.
Door handing is whether the door opens left or right. Many smart locks auto-detect handing during setup, but some need a manual setting. If the lock’s bolt extends the wrong way, check the handing setting before you assume the lock is broken.
Smart Lock Setup and Calibration
Smart lock setup and calibration is where the lock learns its locked and unlocked positions. Power the lock on, then follow the app or keypad prompts.
- Pair the lock with your smartphone app
- Set an admin access code
- Run the calibration cycle so the bolt knows its full travel
- Set auto-lock timing if your model supports it
- Add user codes for family or staff
Calibration matters. A lock that is not calibrated may report “jammed” or fail to lock fully. Run it twice if the first pass feels stiff.
Calibration is not optional. A properly calibrated lock extends bolt life and prevents false jam warnings in the app.
Common Smart Lock Installation Mistakes to Avoid
Most smart lock installation mistakes come down to fit and alignment, not the electronics. Watch for these:
- Skipping the backset check. The lock will not align, and you will drill new holes.
- Over-tightening screws. This warps the mounting plate and binds the bolt.
- Ignoring door handing. The bolt extends the wrong direction.
- Forgetting the strike plate. A misaligned strike plate causes jams every time you lock up.
- Using old batteries. Weak batteries cause calibration failures and dropped connections.
A misaligned strike plate is the fix people miss most. Loosen the plate, shift it slightly, and retighten.
Testing, Troubleshooting, and When to Call a Professional
Test the lock before you call the job done, and test it with the door open first. Lock and unlock it five times with the keypad, the app, and the manual thumb turn. Confirm the bolt extends fully into the strike plate without force, then close the door and repeat. If anything binds with the door open, the problem is the lock; if it only binds when closed, the problem is alignment.
Fixing a Bolt That Binds or a Door That Will Not Latch
Work through these in order, because each fix is cheaper than the next:
- Loosen the mounting screws a quarter turn. Over-tightened screws warp the mounting plate and pinch the bolt. Retest before doing anything else.
- Check the strike plate. Close the door and look at where the bolt meets the plate. If the bolt hits the plate’s edge, loosen the plate screws, shift the plate slightly toward the bolt, and retighten. A chisel and hammer let you deepen the mortise if the plate sits proud of the frame.
- Recheck the door’s square. A door that sags on its hinges will never align with a fixed strike plate. Tighten hinge screws or adjust the hinges before you touch the lock again.
- Confirm the backset and borehole. If the bolt sits high or low in the borehole, the lock and door are mismatched, and no amount of strike-plate adjustment will fix it.
Calibration and Connectivity Errors
A lock that reports “jammed” or fails to lock fully is usually a calibration problem, not a hardware failure. Rerun the calibration cycle from the app, and run it twice if the first pass feels stiff. If the keypad will not respond, check the battery contacts and battery orientation, then recalibrate. For connectivity problems, confirm your Wi-Fi or hub settings, check that the lock is within Bluetooth range during pairing, and re-pair the lock.
Safety and Backup Access
Before you close the door for the first time, confirm you have a working backup entry method. Most smart locks ship with a mechanical key or a keyed override; test it while the door is open. Keep the key outside the house, not in the lock box you just installed. If the batteries fail, know how your model behaves: some default to unlocked, some to locked, and some require a jump-start from a 9-volt battery.
Test with the door open, fix alignment before electronics, and always confirm a mechanical backup works before the door closes behind you.
When to Call a Professional
Some jobs are worth handing off. Enlarging a borehole, working with a metal door, or fixing a door that will not close squarely are all cases where a professional saves time and avoids damage. If your install stalls, or you want it done right the first time, schedule an appointment and our team will handle the fit, wiring, and calibration for you.
Frequently Asked Questions
Can you add a smart lock to any door?
Not every door works with a smart lock. Most smart deadbolts fit doors between 1-3/8 and 1-3/4 inches thick with a standard 2-3/8 or 2-3/4 inch backset and a 2-1/8 inch borehole. Doors with unusual prep, metal frames, or non-standard deadbolts may need a retrofit kit or a different model. Measure your door thickness, backset, and borehole before buying so you avoid a return.
What tools do I need for smart lock installation?
Most kits include mounting plates and screws, but you will still want a Phillips screwdriver, a tape measure, a pencil, and a drill with the bit size listed in the manual. A utility knife helps trim weatherstripping if the new lock sits tighter than the old one. Some installs also need a chisel for strike plate adjustments. Set everything out before you remove the old deadbolt so the swap goes quickly.
How long does it take to install a smart lock?
A straightforward swap on a compatible door usually takes 30 to 60 minutes, including setup and calibration. Retrofit models that reuse your existing deadbolt hardware are on the faster end. Full replacements with new boreholes or strike plate adjustments can run longer. If your door is misaligned or the frame needs work, budget extra time or schedule a professional to handle it.
Do smart locks work with standard deadbolts?
Many retrofit smart locks are designed to work with a standard single-cylinder deadbolt, replacing just the thumb turn and exterior key cylinder. Full smart deadbolts replace the whole lock body instead. Check the manufacturer’s compatibility list against your current deadbolt brand and model. If your deadbolt is older or a non-standard brand, confirm fit before buying to avoid installation problems.